RESOURCES

6 Essential Movements for Optimal Human Performance
If your goal is to feel better and move better, then you have to have a good understanding of the basic movements of the human body. Better Movement means being able to perform the basic 6 movements of the human body well; functional movement you might even say.
Contrary to what you have seen on social media, functional movement doesn’t have anything to do with how hard you make a movement by adding instability or various angles. Functional movement, better movement, has to do with being able to effectively do what your body was born to do – move efficiently!
Here are the Basic 6 Movements of the human body:
(1) Squat:
You use your squatting technique daily to get into the driver’s seat of your car, sit down to have a meal and even to go the bathroom. So it’s definitely an essential exercise for the human body.
To perform the squat effectively your feet need to be shoulder width apart, toes pointed straight ahead.
The next step is engage your core/tighten your tummy and slowly glide your hips backwards, slowly lowering yourself down to about a 90 degree angle at your knee joint.
Please be sure to keep your entire foot in contact with the floor at all times. You should be bearing your weight in your midfoot and heel.
After reaching 90 degrees, proceed back to the start position by engaging your glute (butt) muscles and returning to the start position.
(2) Lunge:
The lunge is probably easiest to describe as something you’ve seen in fencing. One foot forward, one foot back, chest tall. However the lunge is also something you probably do in your everyday life and don’t realize it. It’s not unusual to drop something and reach down to pick it up by stepping back with one foot, retrieving the item from the floor and then standing up to return to your original position. We usually like to start with the static or split stance version to teach the lunge effectively. Let’s make it simple before we make it more complicated.
One foot forward, one foot back. The lead foot should be bearing 65-85% of your body weight in the mid foot and heel.
While the back leg should be positioned with the ball of foot on the floor, with the heel elevated. The ball of the foot, in this version, of the rear leg should be bearing 35-15% of your weight should be in the back foot.
Learning this version first will allow you to do the next version, stepping backward lunge, with much more efficiency and confidence because you’ve learned to balance yourself in a split stance position.
(3) Hinge:
Another essential movement you do more often than you realize. The hinge pattern is merely softening your knees and bending forward or hinging at the hip.
You’ll first want to be in the same position as when you were about to squat.
Tall posture, ears over shoulders, over hips, over knees, over ankles. In essence you should be able to draw a straight line from your ears to your ankles if someone was looking at you from the side view.
From this position you’ll want to tighten your core, squeeze your shoulder blades together, place a slight bend in your knees and bend at the waist.
At the bottom of the movement your torso should be parallel to the floor
To return to the start position, tighten your core, squeeze your glutes, and think about pushing the floor away with your feet as you lift your chest.
As you progress with the Hinge movement you may begin to add load/weight. When you do this your form will slightly change, but the movement basics of hinging at the hip will still be key to doing this movement effectively.
(4) Push:
The push component of the basic 6 is just as it sounds. The only nuance we feel important to mention is that there is both vertical push as well as horizontal push.
Let’s start with vertical push. A great example is the standing shoulder press with elbows facing forward. This position allows for slightly better movement of the shoulder girdle, with less chance of shoulder irritation.
You will start from a tall position, very similar to the start of a squat movement.
Starting with your hands at your shoulders, you will press or push up towards the ceiling.
Be sure to maintain good posture throughout the movement. That means DO NOT let your shoulders get closer to your ears as you move your hands and arms upward.
DO NOT arch your lower back as your push/press upward. In fact you want to make sure to keep solid posture, core activated to keep your ribs from flaring out.
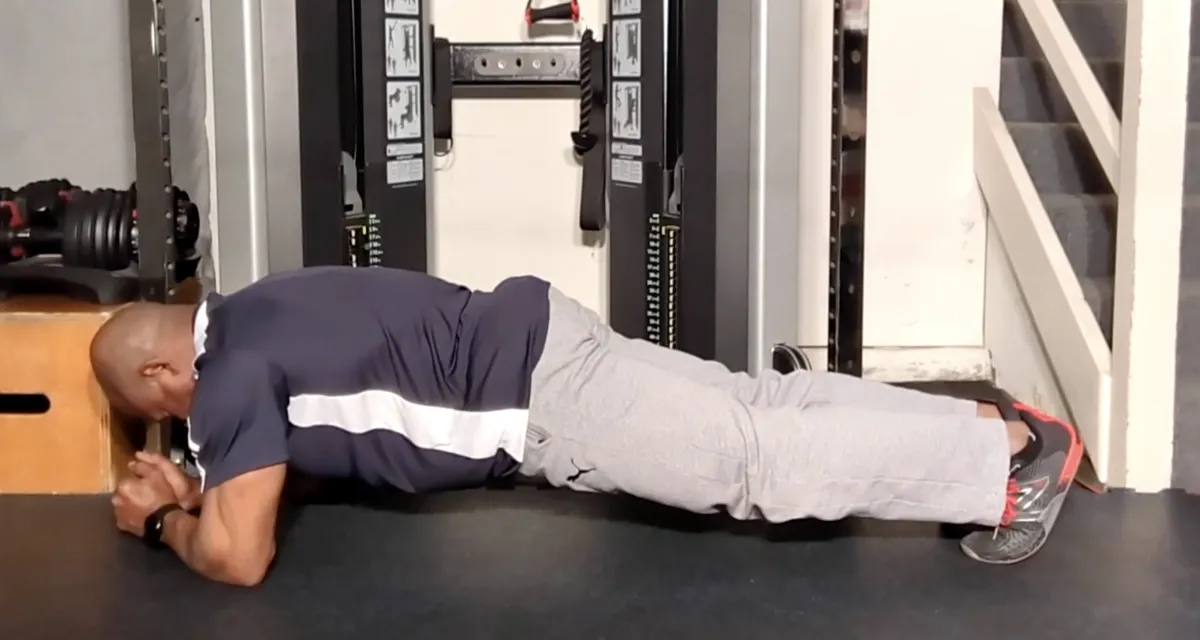
Let’s move to the horizontal version of the push movement. The typical example will be the push-up position.
For our example you would place yourself in a push like position – hands slightly wider than shoulders, feet approximately hip to shoulder width apart.
Think of yourself as a plank. A straight line from ears to ankles.
Maintain this posture as you slowly lower yourself towards the floor.
Get as close to floor as you can while maintain control of the movement and good posture (straight line from ears to ankles)
(5) Pull:
The next movement would be the pull. Like the push movement, this one also has 2 components to it – vertical and horizontal.
Let’s start with the horizontal version of pull. Below are 2 examples of the horizontal pull version.
For the standing version of the pull you would take what we call a ‘ready position’. Slight bend in knees, core engage/tummy tight, chest up with a slight lean forward.
From this position you would squeeze your shoulder blade towards your spine as far as possible.
Then pull your shoulder back so it is behind your ear and your elbow back till it is even with your torso.
You would then perform the exact reverse to return to the start position.
The second version of the pull movement would be the vertical component. For this version of pull let’s use a pull up or pull down as examples. In either case the operation of the shoulders and arms are almost identical.
The first thing you will want to do is squeeze your shoulder blades together and down towards your waist (also known as packing your shoulders). You will then pull yourself up on a pull up, or pull the bar down on a pull down, till the bar is just below your chin.
A key thing to remember is to not swing in either the pull up or pull down. Use your shoulder blades and arms to perform the movement, not your whole body.
(6) Rotation:
This considered the most challenging of all of the movements because it has so many moving parts.There are an unbelievable amount rotational applications. For the sake of ease and effectiveness we will use the ½ kneeling lift for our demonstration.For this final movement of the basic 6 you will want to kneel down on a towel or other cushioned surface on one knee.
Being sure to first check your alignment:
On the up leg, be sure the your knee is directly over your ankle and that both, knee and foot are directly in front of your hip
On the down knee you’ll want to be sure that your knee is directly under your hip as well as having your foot directly behind your knee (you’ll be resting on the ball of your foot on this leg) This is considered a ½ kneeling tall posture.
From here you’ll want to start with both arms on the side of the down knee
Tighten your glute/butt on the down knee as well engage your core.
You will proceed up, out, and across your body ending just above the opposite side shoulder.
Major key here is to make sure only your shoulders do the rotation. It shouldn’t be an entire body move. Nothing should be moving from your navel down. Hips, legs, and feet should all be still and anchored to the floor. The rotation comes from your upper spine.
Believe it or not, you just performed the basic 6 movements of the human body. It is said that those are the main movements and others are hybrids or combinations of those movements.
Practice these often and you’ll create a solid stable foundation that is sure to give you better movement.
Sheila Mann's Testimonial
Sheila Mann doing Suspension Strap Push-ups on an elevated Single Leg.
Just another Saturday Workout Part 2
Spray Tan Fitness
Dreams or Goals
Intro to Self-Myofascial Release
Self Massage using the Energy F X Tube (Upper Body)
Self-Massage for Lower Body using Energy F X Tube (IT Band , Glutes)
Level 3
This is our advance level. In this level you will be asked to increase the challenges to your strength, balance and to some degree, your conditioning. We continue to focus on the major joints of the body (hips, shoulder, and knees) with the added challenge of resistance. This level also includes the added challenge of coordination, as many movements require the integrated movement of both upper and lower body.

Level 4
This is our premium level. In this level you will be asked to significantly challenge your body through increased demands on your functional core strength in movements that will significantly challenge your balance and strength simultaneously. Here we will ask you to begin to optimize your balance, core activation, and improved range of motion in a functional aspect – integrated movement of both upper and lower body, but at a higher level of accountability.

